Same three steps, clearer screens
If you already use the CMR Generator, nothing about the way you work has to change. You still start by uploading invoices, packing lists or previous CMRs, you still review what was extracted, and you still finish by downloading a filled CMR.
The redesign is about the screens around those steps. Each page now tells you up front what it needs from you, shows what is already done, and keeps the main actions within reach. Below is a walk through every screen, in the order you meet them.
Upload: see what will be parsed before you parse it
The Upload logistics documents page is now split into two columns. On the left are your files: add several at once, and each one appears as its own card with its page count and how many of its pages are selected. On the right, a Parsing card shows how many pages are selected and how many credits you have left — before you start parsing, not after.
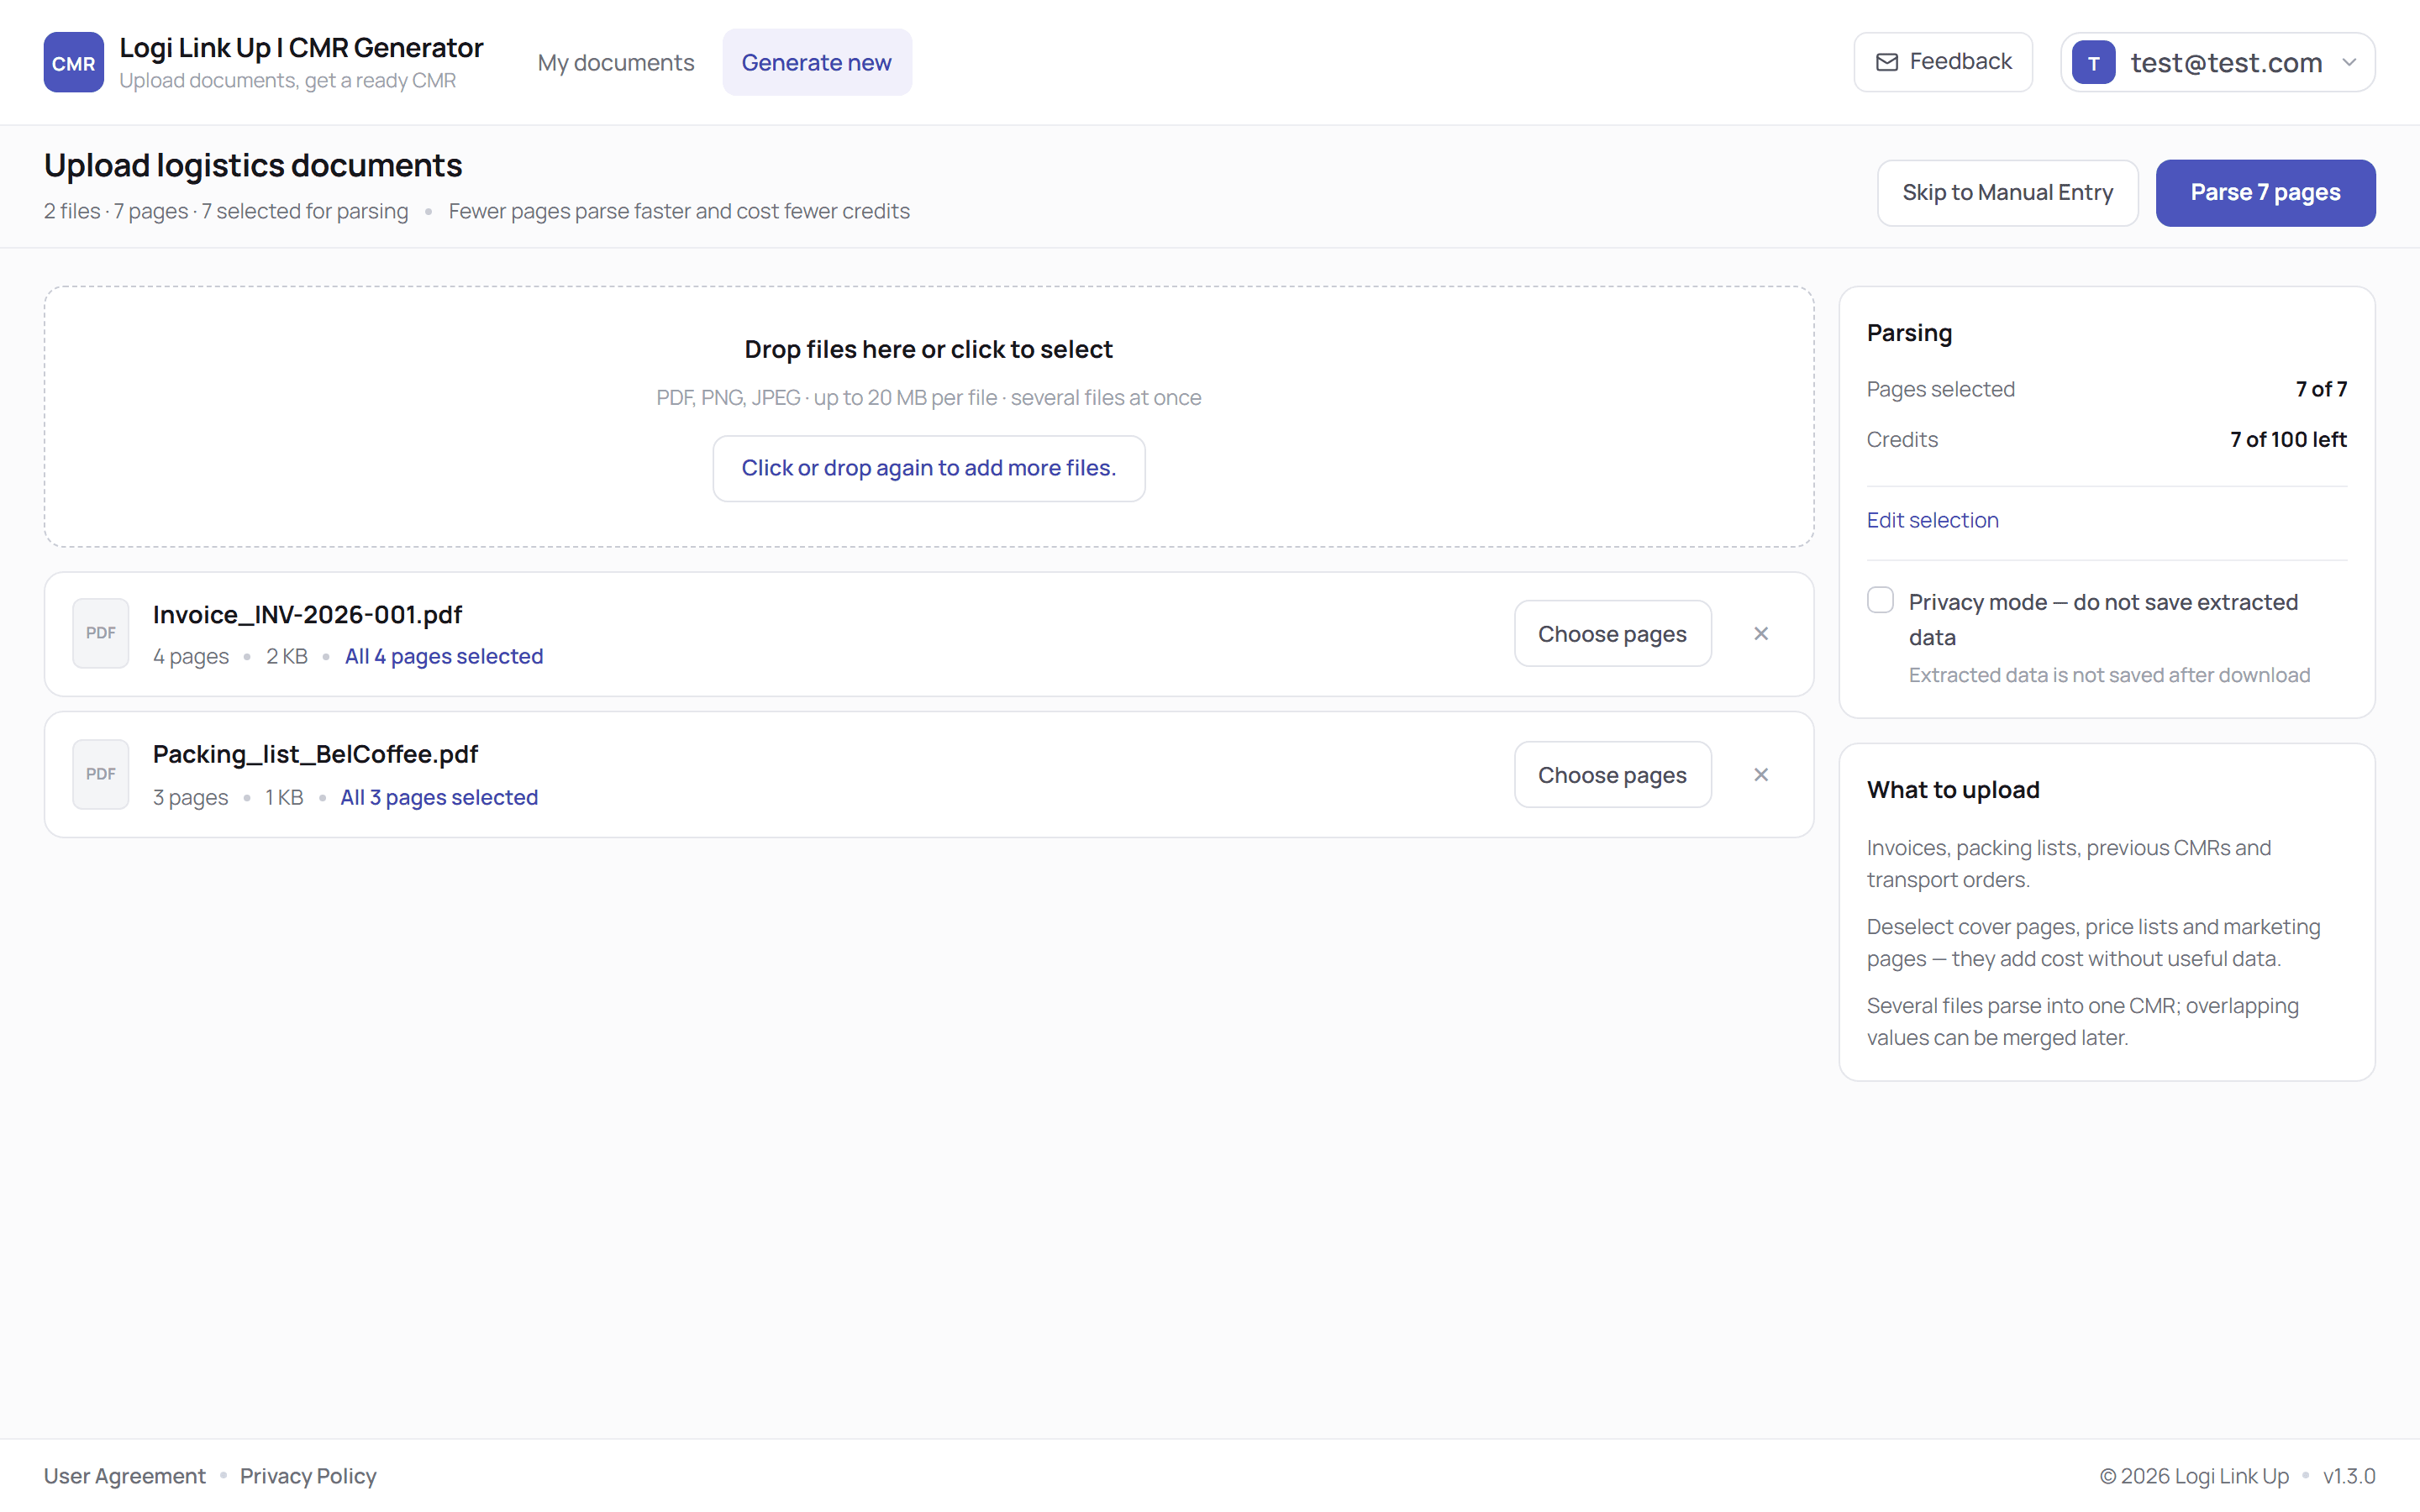
Pages are chosen per file. Leave out cover sheets, price lists and marketing pages, and only the pages that carry shipment data are processed. The parse button at the top always reflects your current selection — “Parse 7 pages” in the screenshot above.
Tick Privacy mode when you do not want the extracted data to be saved. Below it, a short What to upload guide lists the document types that work best: invoices, packing lists, previous CMRs and transport orders.
The CMR form: numbered sections and a live preview
After parsing, the CMR form opens on the left with a live preview of the CMR on the right. The form is split into numbered, collapsible sections — Sender, Consignee and the rest — and each section header shows a one-line summary, such as the company name and country. You can see what is filled in without opening every section.
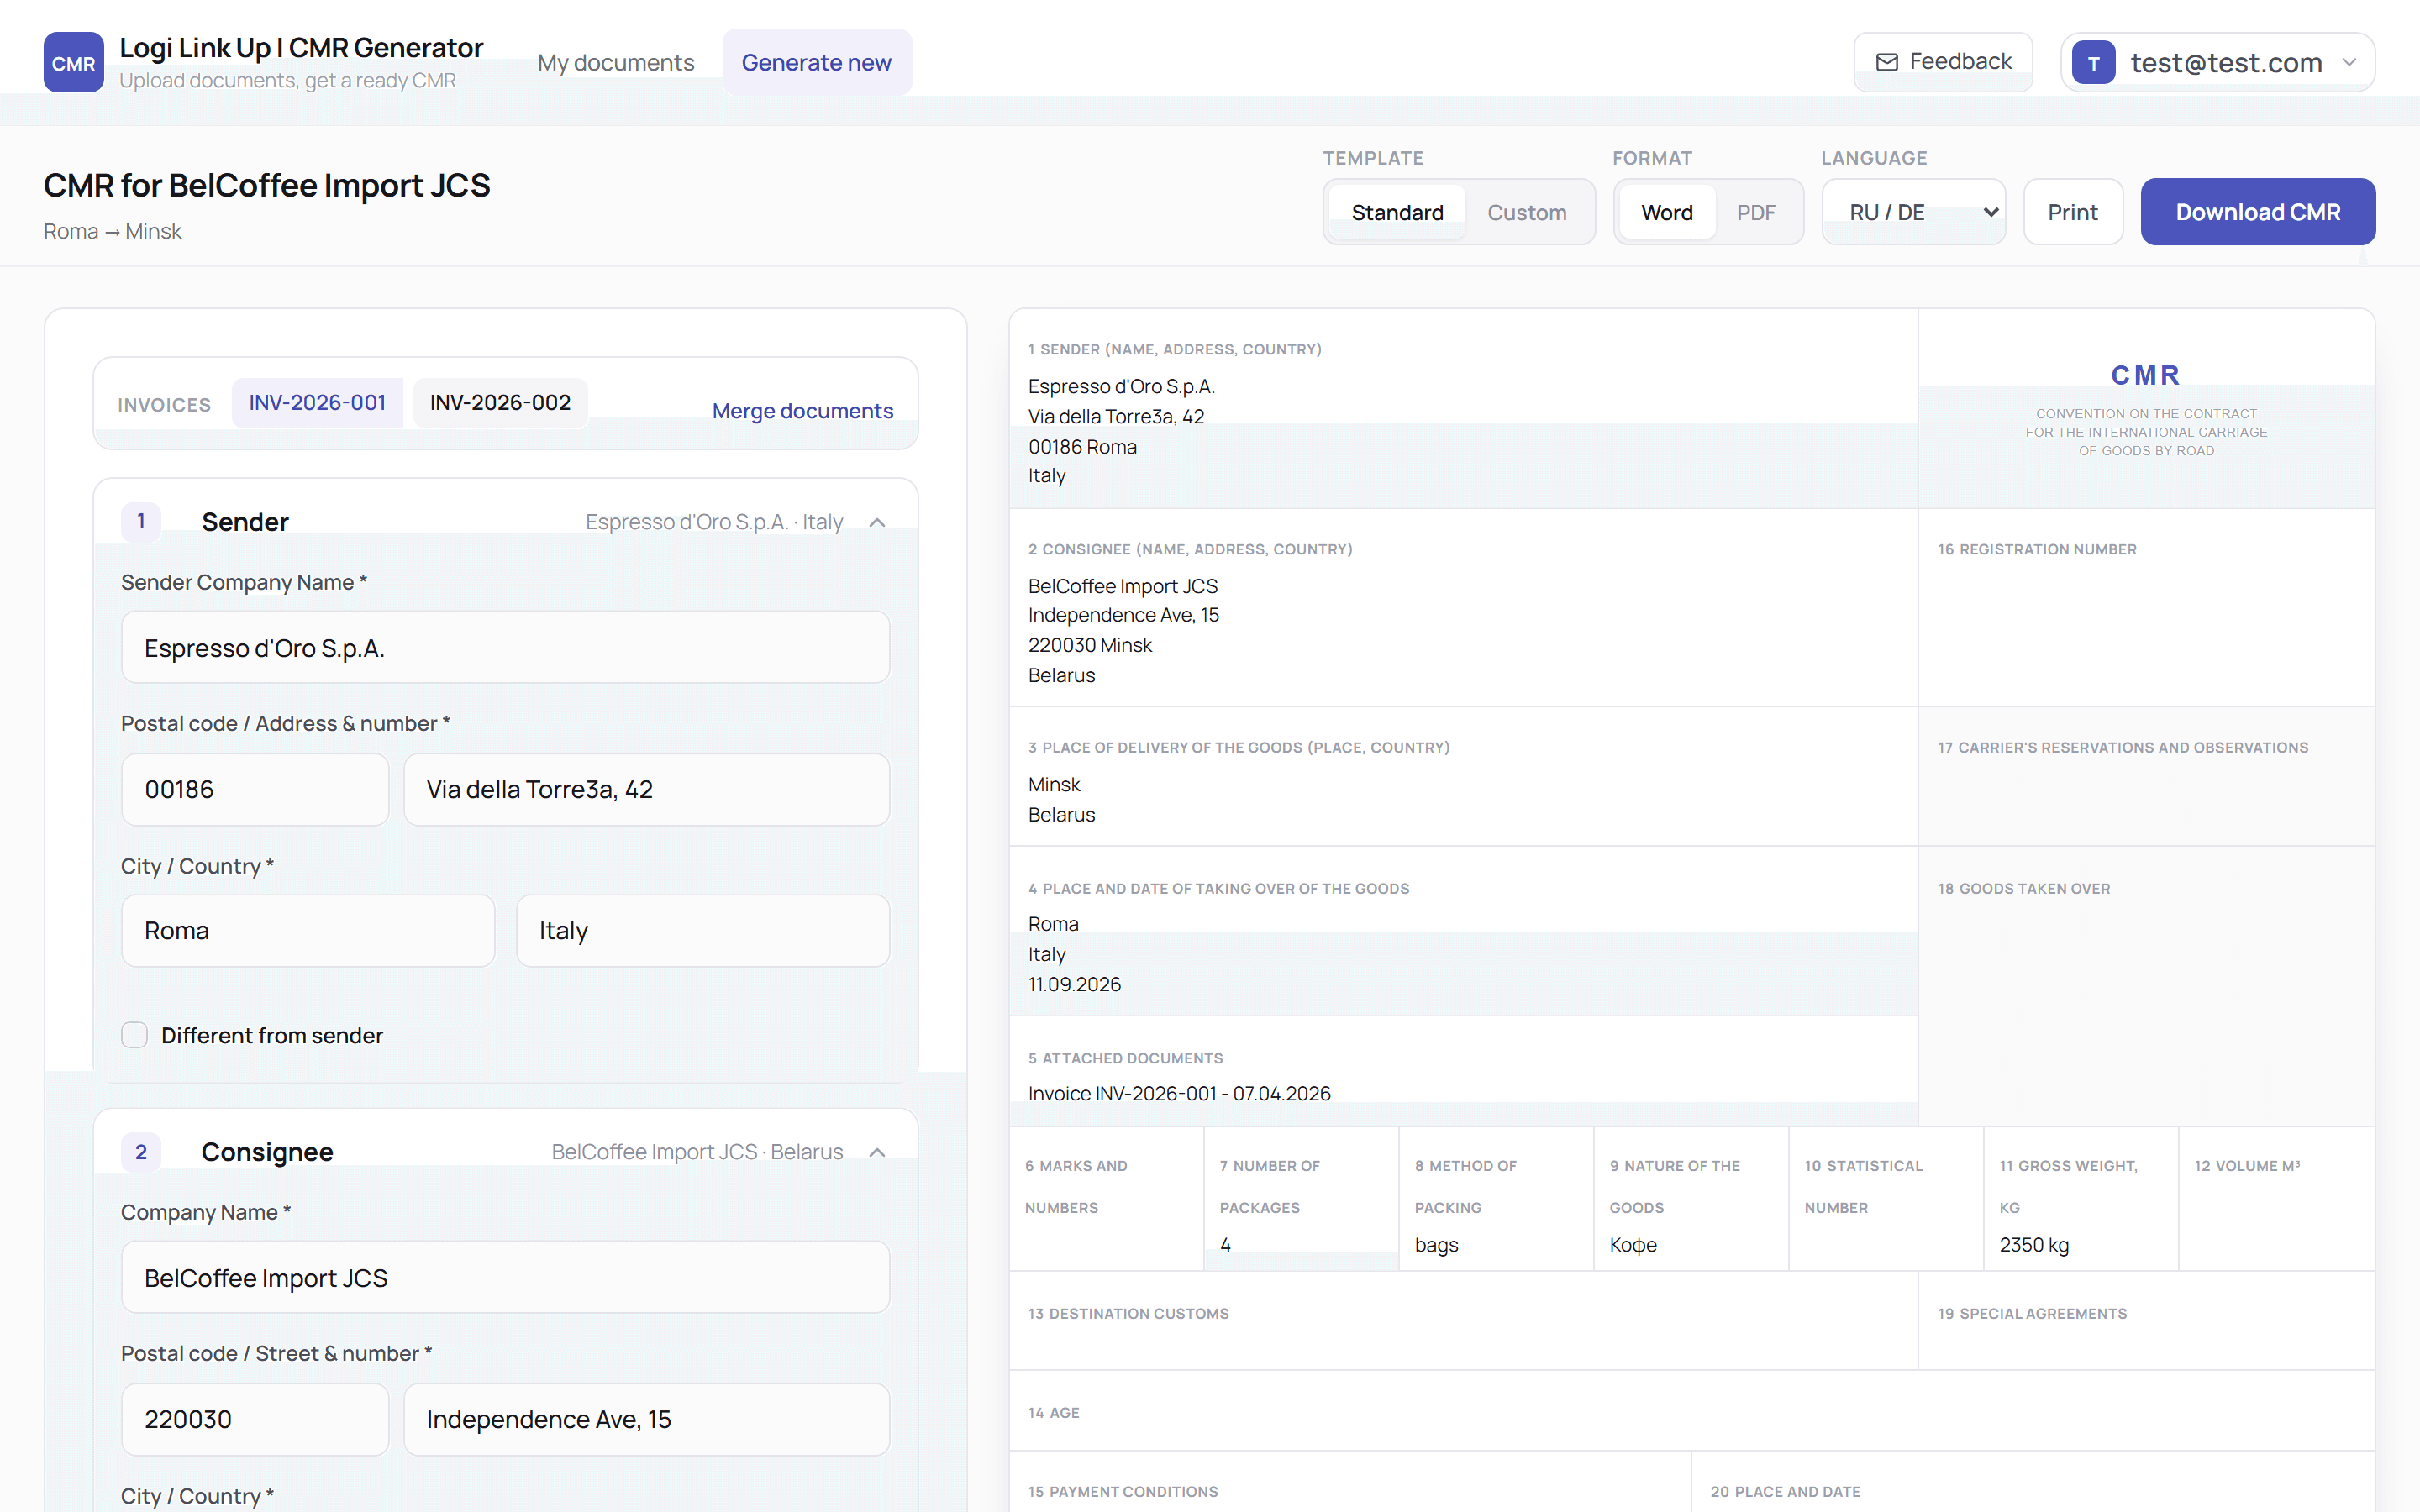
Fields filled from your documents carry an AUTO badge, so you can tell which values came from the upload and which were typed by hand. When your documents contain other candidate values for a field — two different gross weights, for example — they appear as chips, and one click puts the right one in.
If a session includes several invoices, they are shown as chips at the top of the form. The preview stays in view while you work through the sections, and the action bar stays pinned while you scroll: choose the template (standard or your own), the format (Word or PDF) and the language, then Print or Download CMR.
Merging documents in three steps
When one shipment covers several invoices, Merge documents combines them into one CMR. Merging now runs in three clear steps: Select, Review and Confirm.
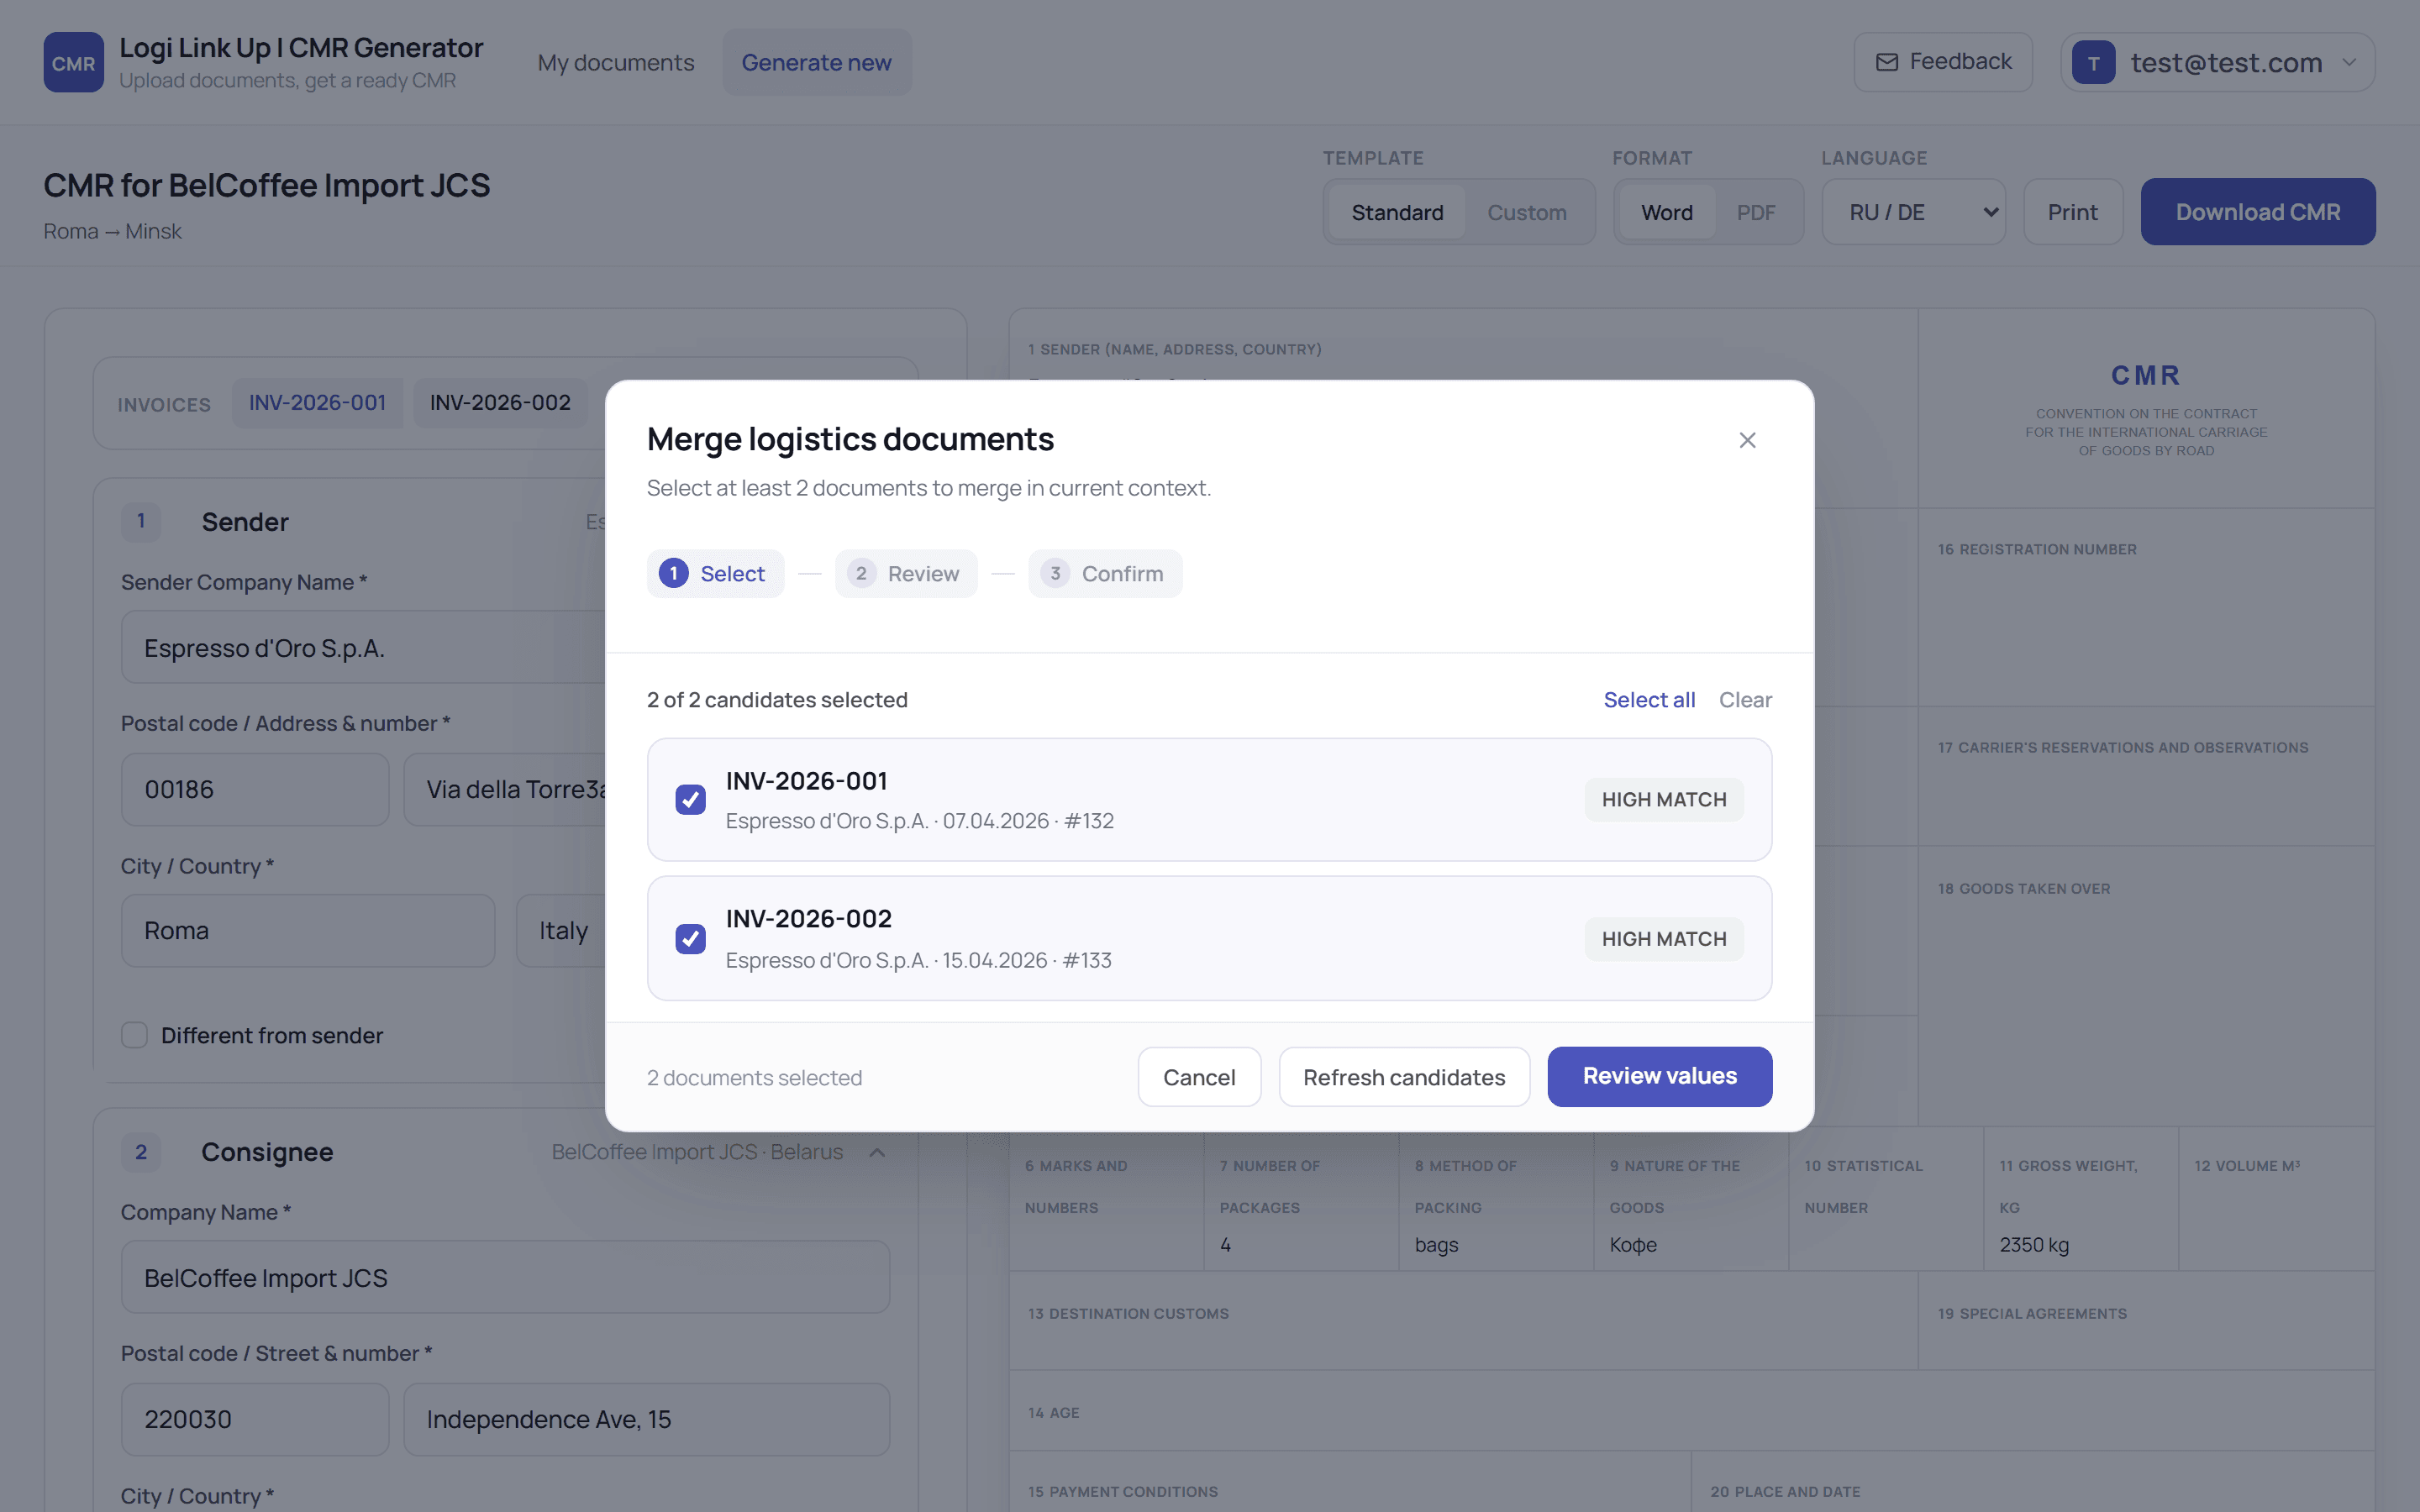
In the first step, each candidate document shows how closely it matches the one you are working on, so a document that does not belong is easy to spot.
In the review step, every field shows how its value was reached: the documents agreed, the values were summed or joined, or there is a conflict for you to resolve. Fields that are identical across all documents are collapsed, so you only review what actually differs. Then you confirm the merge.
My documents: every session in one table
My documents lists every session in a table with the invoice number, sender, goods, weight and packages. Search by invoice, sender or goods, sort the list, and page through older sessions.
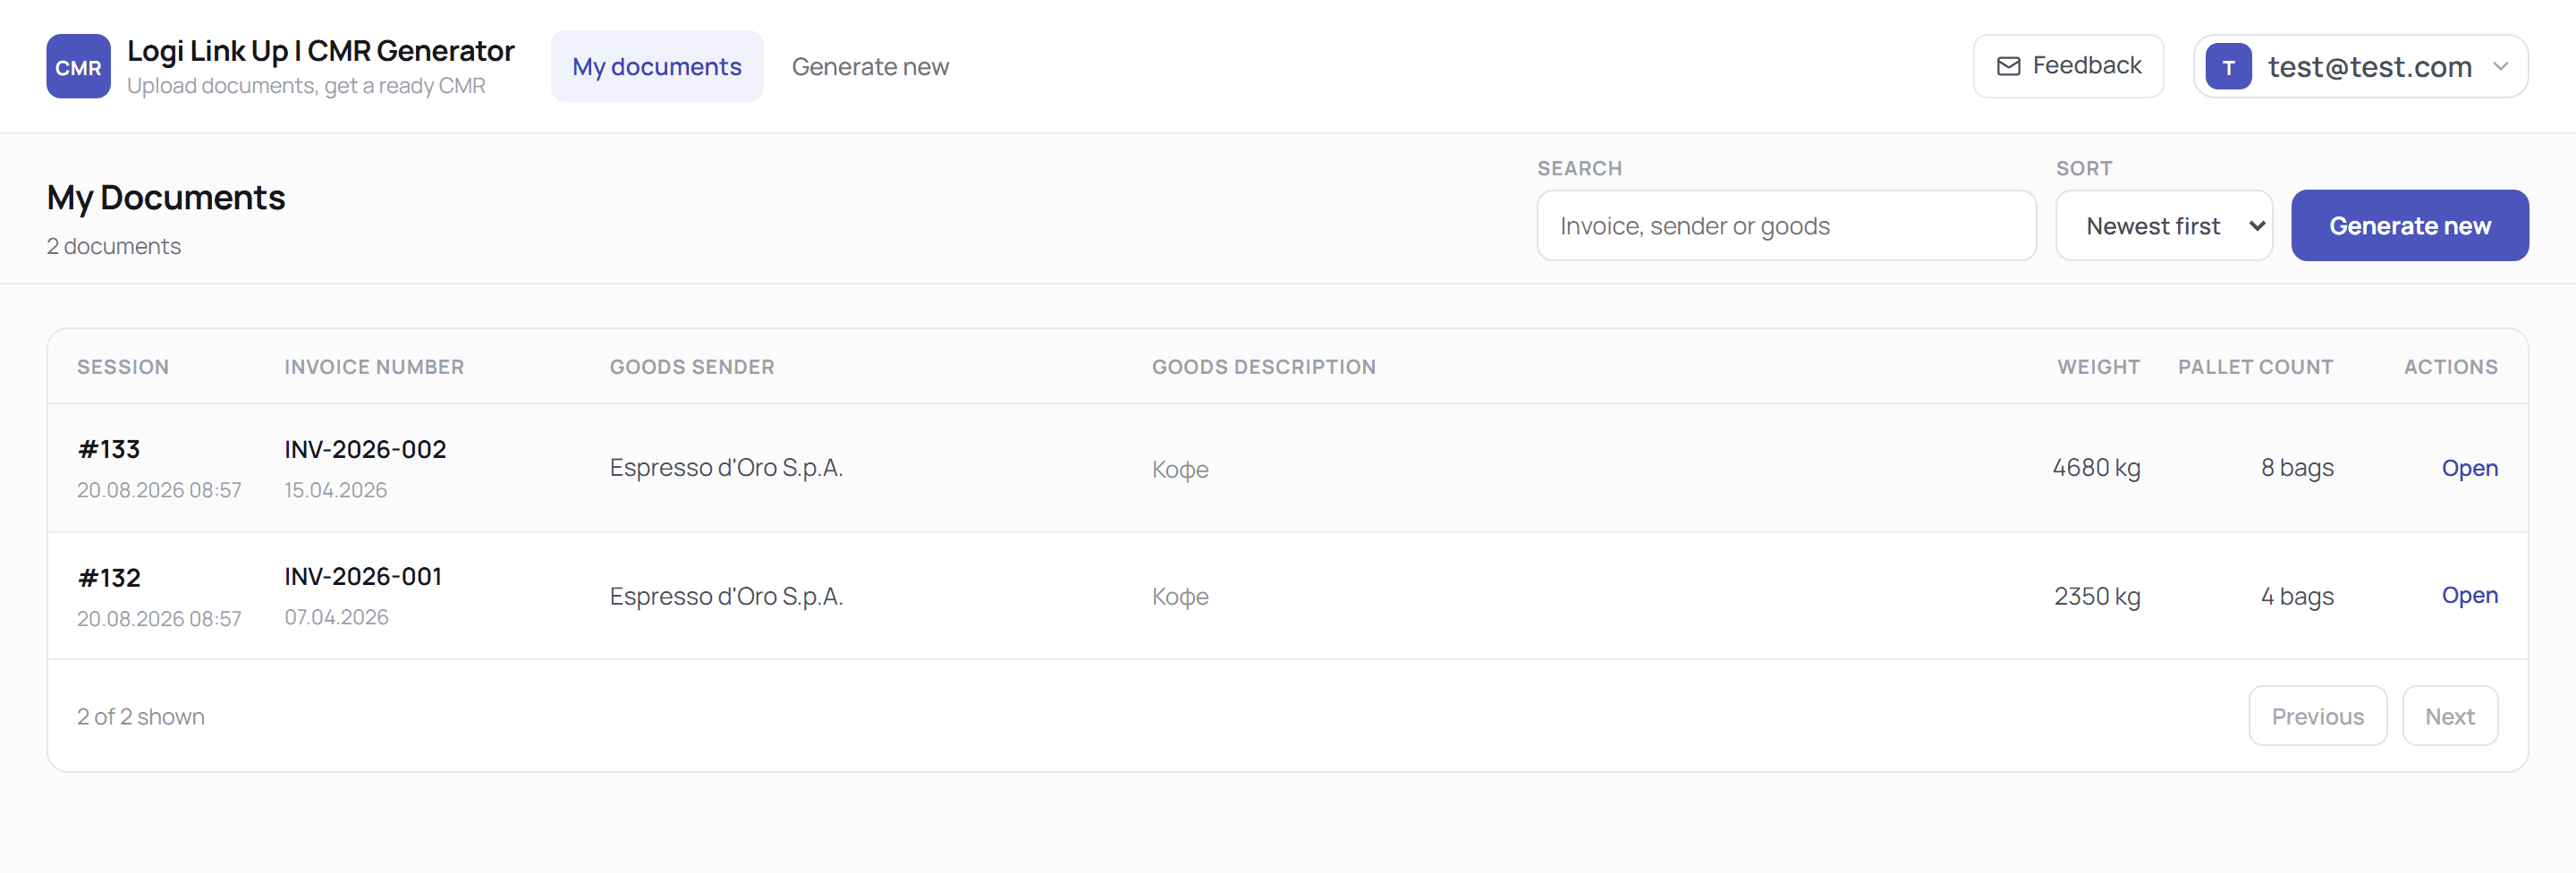
Reopen any session from the table instead of uploading the same files again when you need that CMR a second time.
Billing: your subscription at a glance
The Billing page puts the essentials in one place. The subscription card shows your plan, your seats, how many days are left in the billing period, the period dates and how many credits you have used.
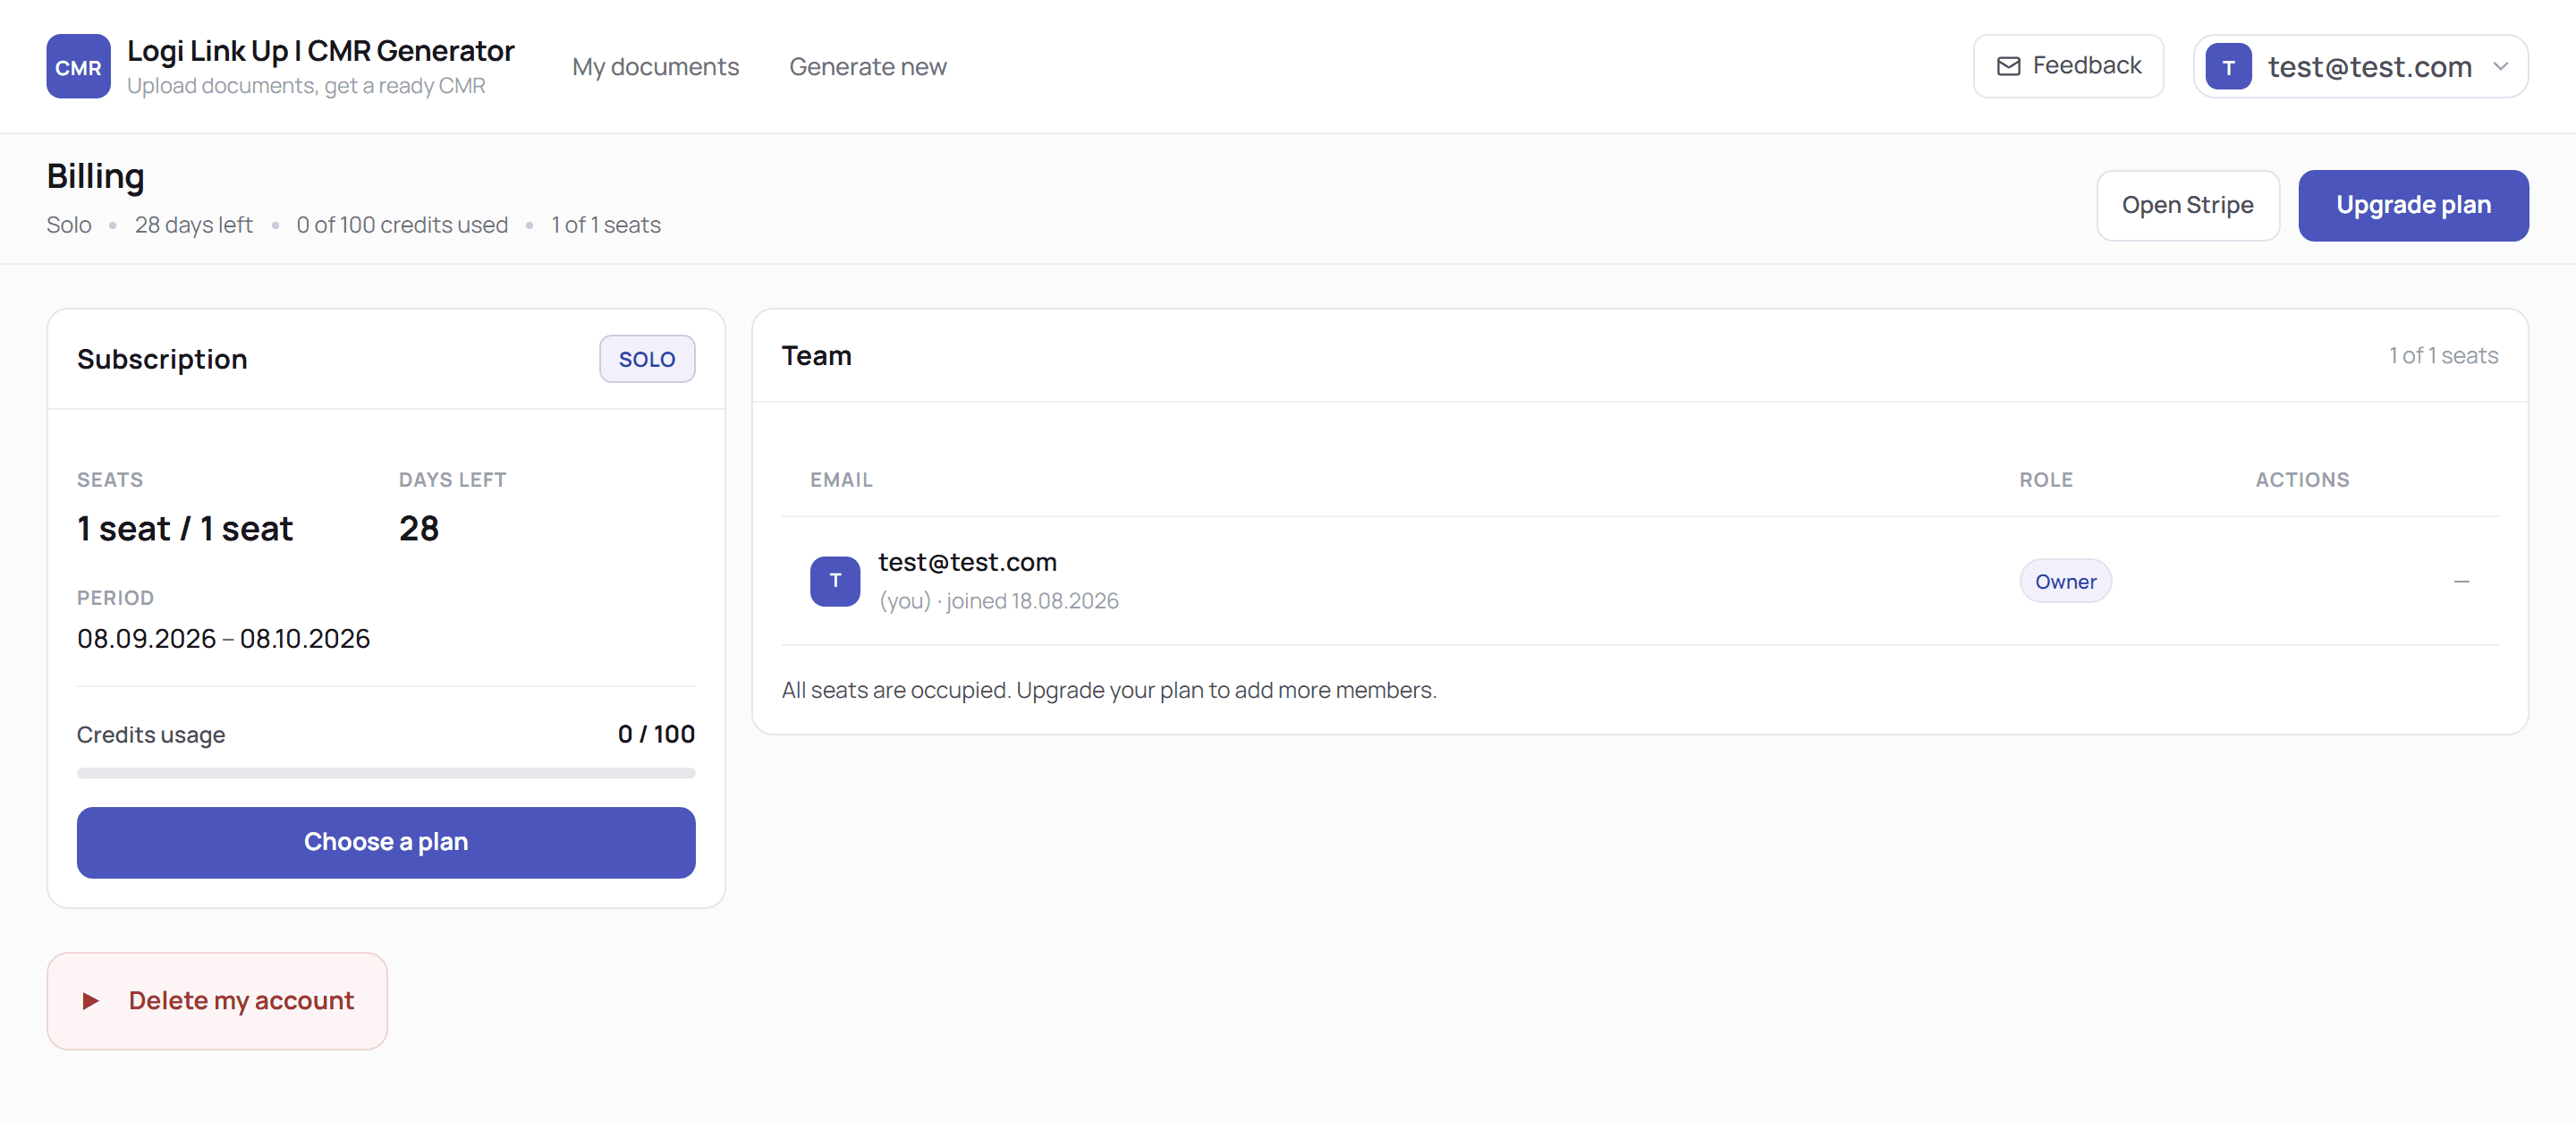
Next to it, the team card lists the people on your account and their roles, so you can see who has access and how many seats are taken.
Preferences: warehouses and destination customs
Saved warehouses and destination customs entries now live in Preferences, in two tabs: Warehouses and Destination customs. Each tab lists your saved entries in a table, and you add or edit an entry in a dialog.
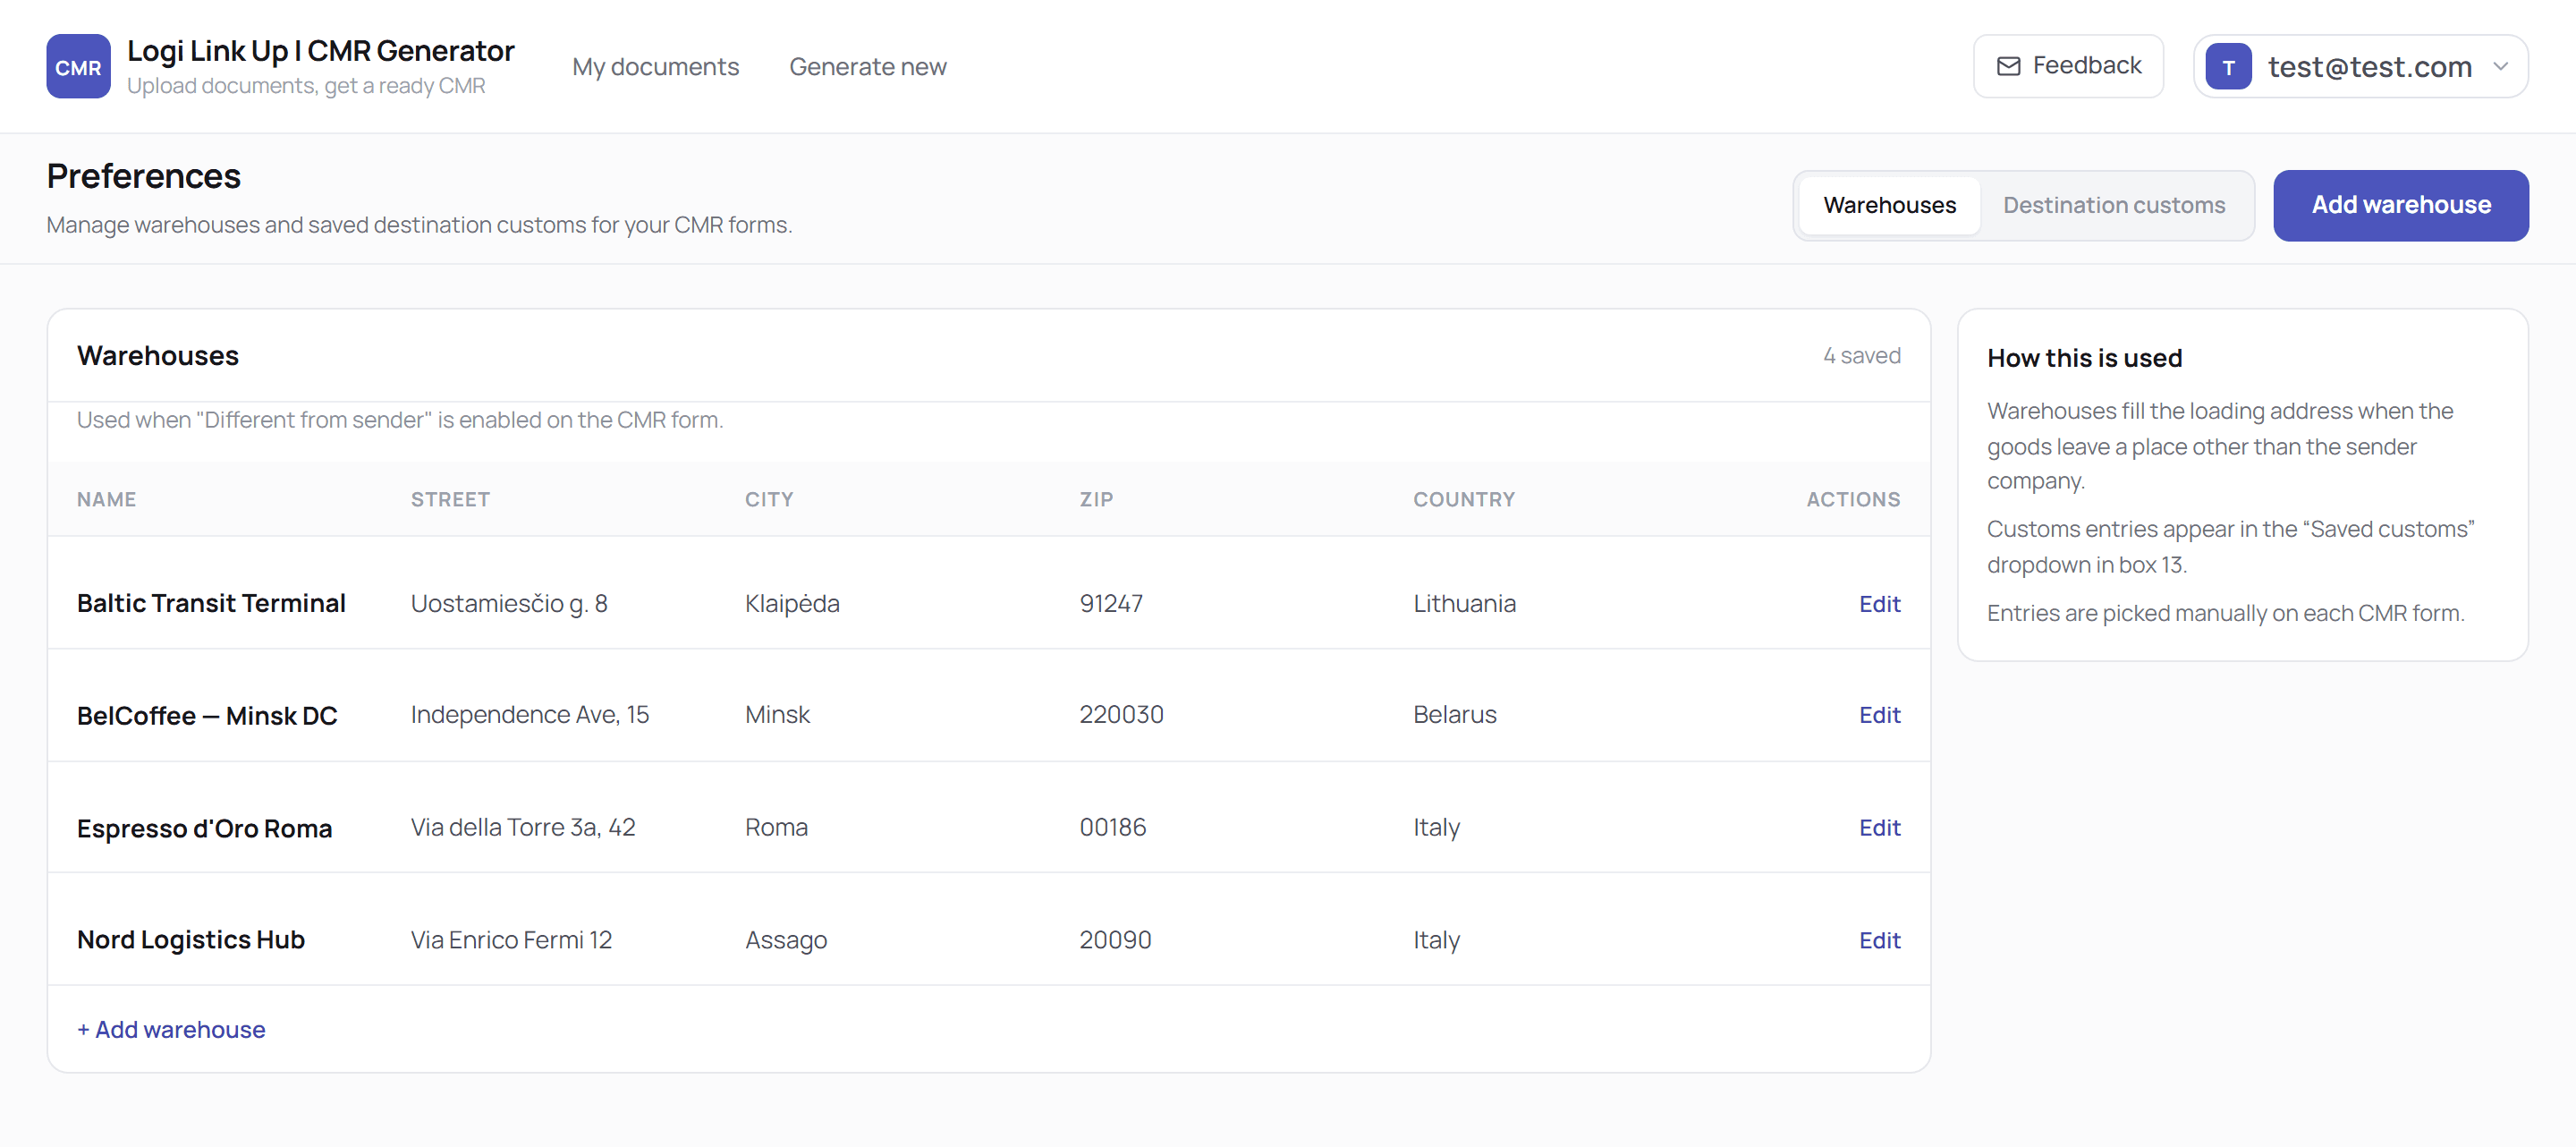
A How this is used sidebar explains where each entry appears on the CMR form: warehouses fill the loading address when the goods leave from somewhere other than the sender company, and saved customs entries appear in the dropdown for box 13. You still pick entries yourself on each CMR.
Also improved
- One consistent design across all screens, including the custom template editor, which now has a cleaner three-column layout with placeholder search and filters.
- Three interface languages: the whole interface is available in English, Russian and Polish.
- Works on phones: the header and the action bar stay visible as you scroll.
- A Feedback button on every page, so you can tell us what works and what does not without leaving the app.
Frequently asked questions
Do I need to change how I work?
No. The steps are the same as before: upload your documents, check the extracted data, and download the CMR. The redesign changes how each screen presents those steps, not the steps themselves.
Are my documents, templates and saved warehouses still there?
Yes. The redesign only changes the interface. Your past sessions in My documents, your custom CMR templates, and your saved warehouses and destination customs entries all remain in your account.
Did plans or pricing change?
No. The redesign does not change plans or pricing. The Billing page simply shows your plan, seats, billing period and credits more clearly.
Which languages does the interface support?
English, Russian and Polish. The whole interface is available in all three languages.
Does the CMR Generator work on mobile?
Yes. The interface works on phones, and the header and the action bar stay visible as you scroll.
See the redesigned CMR Generator
Upload an invoice or a packing list and go from documents to a downloaded CMR in the new interface.
Open CMR Generator →